Activities By Teachers For Teachers
All these Science Activities were featured on some fantastic teacher blogs who are passionate about creating fun, easy and educational activities for your next science class.
Year 7-8 Chemistry Activity – Periodic Table Battleship
Year 6-8 Chemistry Activity – Grow Your Own Borax Crystals
Year 10 Biology Activity – Make Your Own Brain Hat
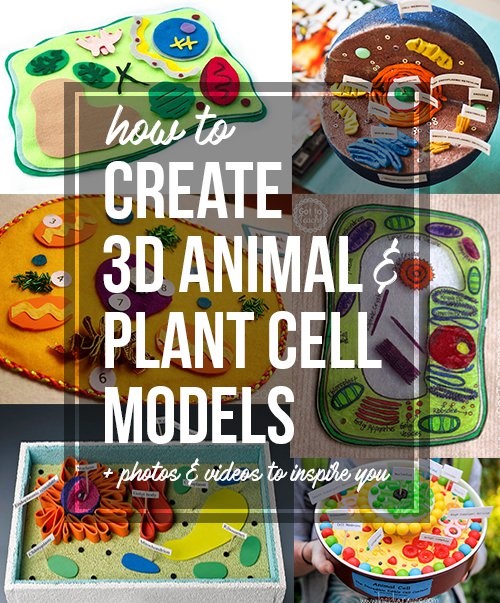
Year 11-12 Biology Activity – Create 3D Animal or Plant Cell Models
Year 6-7 Physics Activity – Steady Hand Game
Want All These Resources On The Go?
Activity 1
Year 7-8 CHEMISTRY: Periodic Table Battleship
From: Teach Beside Me
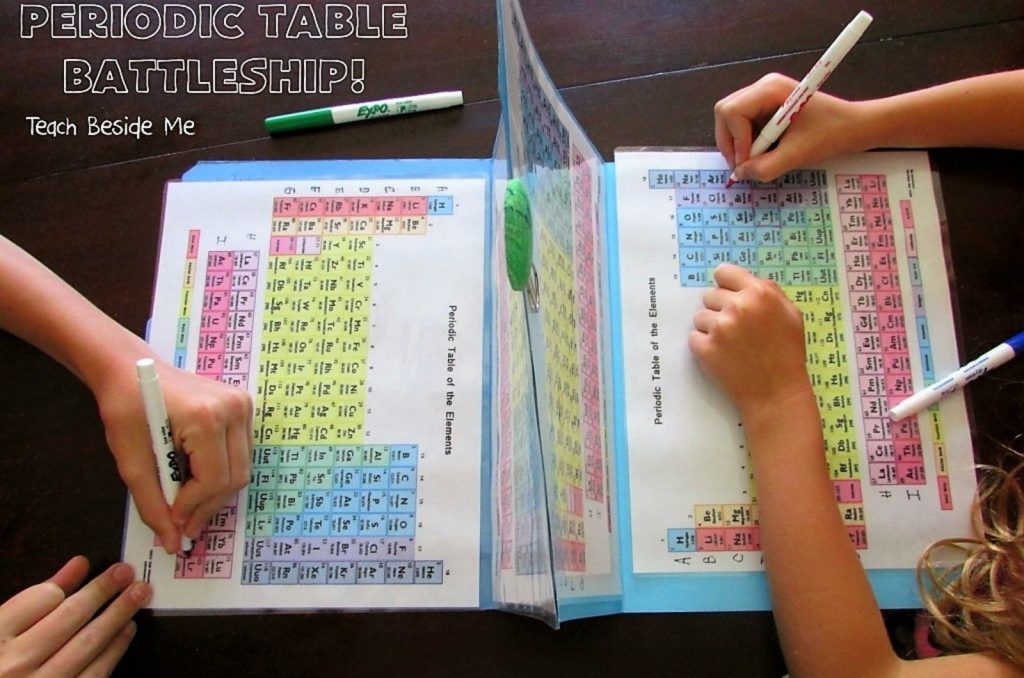
You Will Need:
• 4 x laminated copies of the periodic table
• 2 x file folders
• 1 x big binder clip
• 2 x whiteboard markers
Learning Outcome:
By playing this game students will become more familiar with the periodic table, its elements, location on the periodic table and their abbreviation and atomic number. Ideally, they’ll memorise most, if not all of the periodic table of elements, and be able to identify each element.
Method:
Step 1 – Print out and laminate 4 copies of the periodic table sheet.
Step 2 – Along the left-hand side of the table, label each row from A-I and label numbers 1-18 across.
Step 3 – Attach 2x copies to the inside of the file folder with binder clips.
Step 4 – Clip the folders together at the top with a binder clip to hold the folders open so they stand up.
Step 5 – Players then circle rows to make 1 group of 2 squares, 2 groups of 3 squares, 1 group of 4 squares and 1 group of 5 squares. These are the ‘battleships’.
Step 6 – The ships can be arranged horizontally or vertically but not diagonally.
Step 7 – Players can choose to call out the coordinates of the element, the element’s atomic number, the abbreviation of the elements or the names of the elements.
Step 8 – Players mark an X on the elements that are a ‘miss’ and circle the elements that are a ‘hit.’
Step 9 – Play until one person sinks all the other’s battleships.
Activity 2
Year 6-8 CHEMISTRY: Grow Your Own Crystals
From: Instructables
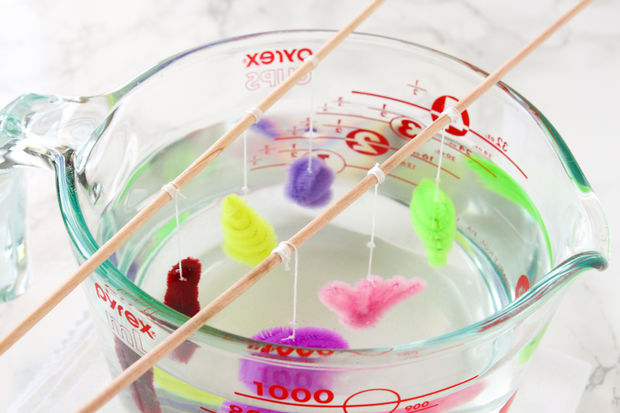
You Will Need:
- 3 x Tablespoons of Borax
- 1 x Cup boiling water
- 1 x Packet of pipe cleaners
- 1 x Glass mason jar
- 1 x Roll of Paper towel
- Skewers/pencil/chopsticks
Learning Outcome:
By playing this game students will become more familiar with the periodic table, its elements, location on the periodic table and their abbreviation and atomic number. Ideally, they’ll memorise most, if not all of the periodic table of elements, and be able to identify each element.
Safety Tip – Wear gloves when pulling your geode crystals from the borax solution.
Method:
Step 1 – Twist a coloured pipe cleaner into a loose coil and shape it as desired.
Step 2 – Measure your fishing line or thread and cut so when suspended in the glass the pipe-cleaner coil won’t touch the bottom of the sides of the glass.
Step 3 – Tie fishing line or thread to the pipe-cleaner coil, attach to a wooden skewer, pencil or chopstick.
Step 4 – Add 3 tablespoons of borax powder for each cup (237 ml) of boiling water in the jar.
Step 5 – Stir the solution until none will dissolve anymore and it becomes a saturated solution.
Step 6 – Suspend your pipe-cleaner coil in the glass jar.
Step 7 – Cover the solution with something to keep it hot for longer.
Step 8 – Leave over night for best results (between 8-12 hours).
Step 9 – Pull your geode crystals out of the solution then snip off the fishing line or thread.
Step 10 – Allow to dry fully on a paper towel.
Discover Our Range of STEM Tables
Activity 3
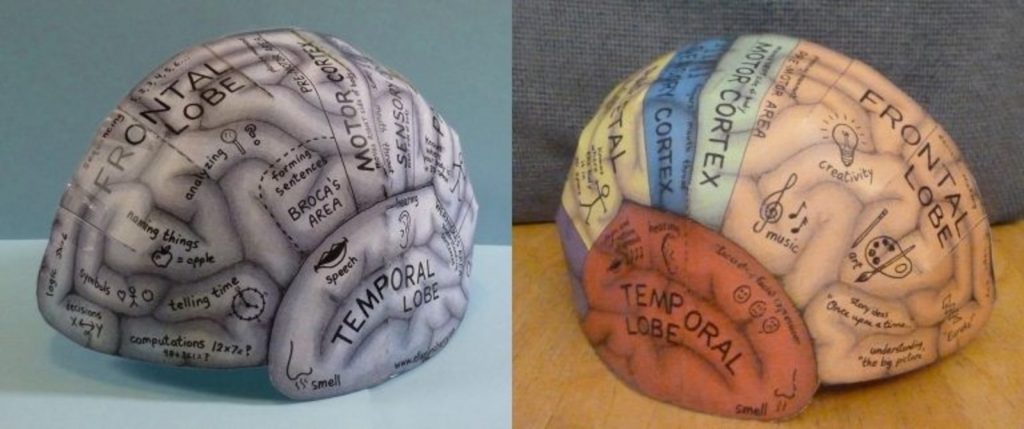
Year 10 BIOLOGY: Make Your Own Brain Hat
From: EllenJMChenry
You Will Need:
- Brain hat printable (see link above) on cardboard paper
- Scissors
- Sticky tape or super glue
- Coloured pencils or crayons
- Human Brain Parts/Function Table (Download PDF below)
Learning Outcome:
Students learn to identify parts of the brain in the left and right hemispheres. Each hemisphere has 4 lobes: frontal, temporal, parietal, and occipital. Each lobe may be divided into areas that serve specific functions such as speech, senses, memory and motor skills. Let students not only identify the parts of the brain but also each part’s function. Test their memory by setting them the task of labelling all the parts on the blank brain.
Method:
Step 1 – Visit the link above to download the printables and print diagrams onto cardboard paper.
Step 2 – To assemble, first cut out both hemispheres around the outside edge. Then snip in on the dashed lines.
Step 3 – Don’t cut the triangle out. Just snip the dashed lines. Pull each (now snipped) dashed line over until it touches the other line.
Step 4 – Secure with tape or glue. It should then take on a half-round shape.
Step 5 – To put these two halves together, simply choose one side to overlap just slightly onto the other.
Step 6 – Secure with tape.
Step 7 – Have students try on their brain hat and take turns identifying the parts of the brain as well as its specific function.
Want All These Resources On The Go?
Activity 4
Year 11-12 BIOLOGY: 3D Plant/Animal Cells
From: Owlcation
You Will Need:
(Edible)
- Cake (either rectangle or round)
- Rice Krispy treats
- Jelly
- Skittles
- Gummy worms
- Chewing gum
- Marshmallows
- Cookies
- Sprinkles
- Food colouring
- Gobstoppers
- Sour straps
You Will Need:
- Styrofoam
- Pipe cleaners
- Clay or playdough
- Shower gel or shaving cream
- Noodles or pasta
- Yarn or twine
- Rubber bands
- Cardboard
- Bouncy balls
- Felt fabric
Learning Outcome:
At the end of this plant and animal cell activity students will be able to differentiate between the structure and functions of the plant and animal cell organelles, including cell membrane, cell wall, nucleus, cytoplasm, mitochondrion, chloroplast, and vacuole.
You can assign this activity as an in-class task (you will need to provide materials) or let students build their animal or plant cells at home (especially if they’re baking an edible cake-based cell).
The materials and food listed here are just examples. Feel free to add or subtract anything you want. Get creative!
Method:
Step 1 – Working in pairs, students decide if they want to build a plant cell or animal cell, then decide if they want to use edible or non-edible materials.
Step 2 – Students brainstorm materials/edibles needed.
Step 3 – Students gather materials (either purchasing themselves or teacher supplies).
Step 4 – Students build their plant or animal cell referring to the provided table and diagrams, labelling each respective part using toothpicks and paper.
Step 5 – Students complete their animal or plant cell and present them to the class.
Step 6 – If students choose the edible option, they may want to eat them with the class.
Note
Streamline your whole lesson by downloading our PDF resource complete with plant and animal cell diagrams and a table that lists the part and function of each.
Want All These Resources On The Go?
Activity 5
Year 6-7 PHYSICS: Steady Hand Game
From: 123 Homeschool Me
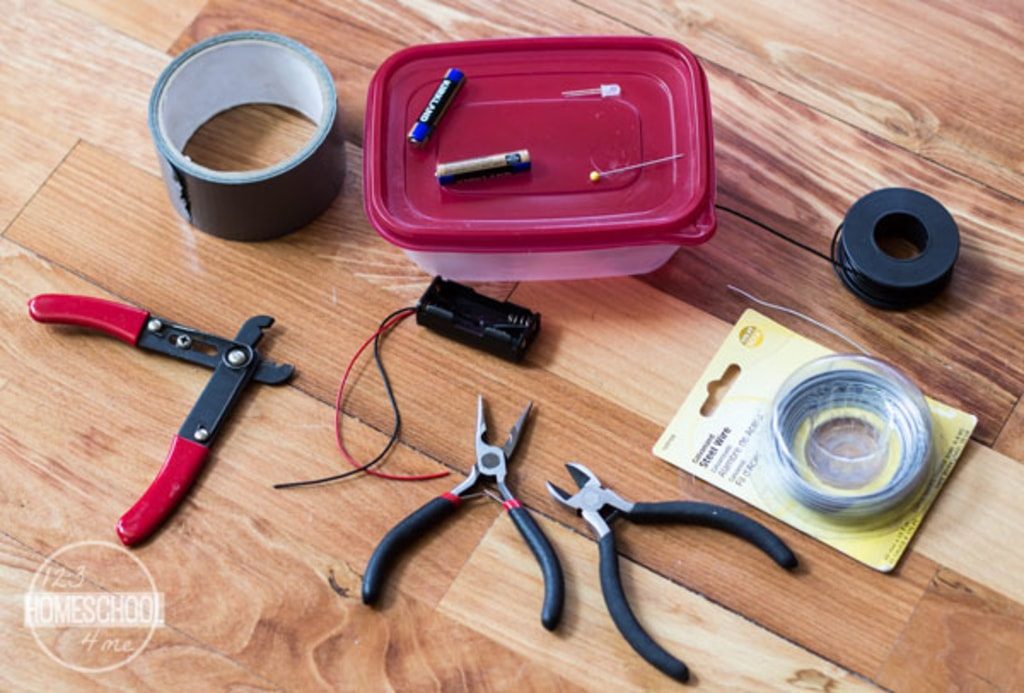
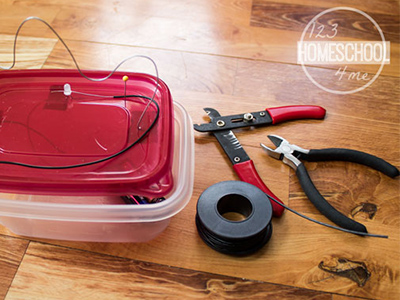
You Will Need:
- 1 x empty container with lid
- 1 x AAA battery holder
- 2 x AAA batteries
- 1 x LED light
- 1 x Pin or needle
- Stiff unshielded wire (20 gauge galvanized steel wire or wire coat hanger)
- Flexible shielded wire (22 gauge hook-up wire)
- 1 x Roll of Duct tape
- 1 x Wire stripper
- 1 x Wire cutter
- 1 x Pliers
Learning Outcome:
Students learn about electricity, and how circuits are made when electrons flow from the negative terminal to the positive terminal through a copper wire conductor.
Electrical circuits can get quite complex, but basically you always have the source of electricity (such as a battery), a load and two wires to carry electricity between the two.
Electrons move from the source, through the load and back to the source.
Method:
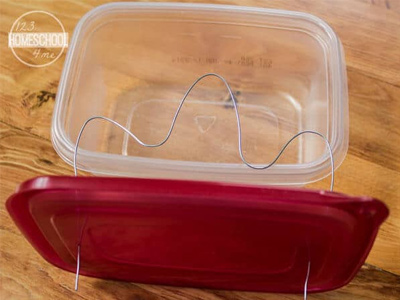
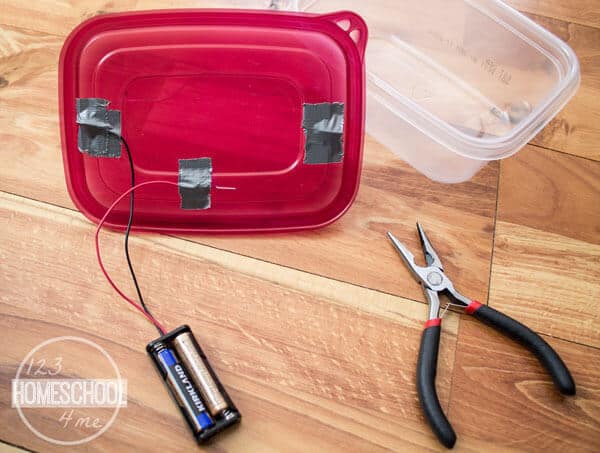
Step 1 & 2
First, use your pin to make small holes on either side of the lid. Cut off a piece of stiff wire and feed it through the holes making a wiggly, curvy design on top of the lid such as the one shown.
Then use your pin to make two small holes to feed the LED light legs through.

Step 3
Use pliers to attach the battery holder to the connections for the stiff wire and the LED wire on the underside of the lid.
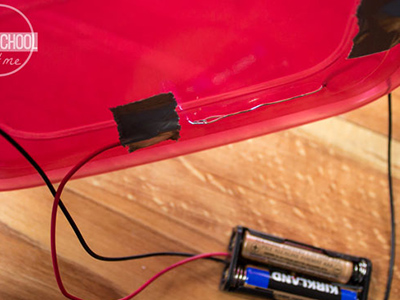
Step 4 & 5
Bend the connections flush with the lid and use duct tape to secure them.
Use your pin to poke a hole in the lid where you would like to place the flexible wire with the loop that the player will control while playing the game.
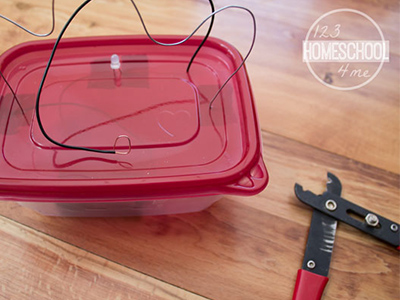
Step 6
Cut a piece of flexible wire long enough to attach to the LED on the underside, come through the hole, and move across the entire curvy wire. Use your wire strippers to strip the portion that will attach to the underside of the lid.
Step 7
Thread the portion of the wire with the shield stripped off through the hole on the top of the lid and use the needle nose pliers to bend the wire around the remaining, unused LED lead. Secure with duct tape.
Step 8
Strip some of the shielding off the other end of the flexible wire on the top side of the lid and use your fingers to form this potion into a circular loop.
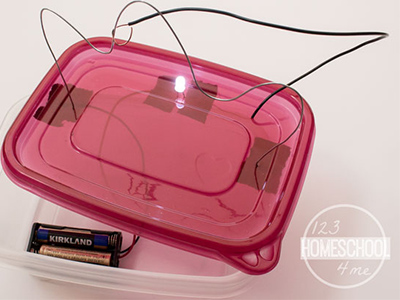
Step 9
Lastly, connect the loop to the curvy wire. When the loop touches the wire, the LED should light up. When it is held in such a way that there is no connection, the light should stay off.